How to Take Jeep Wrangler Doors Off Safely (Step-by-Step Guide)

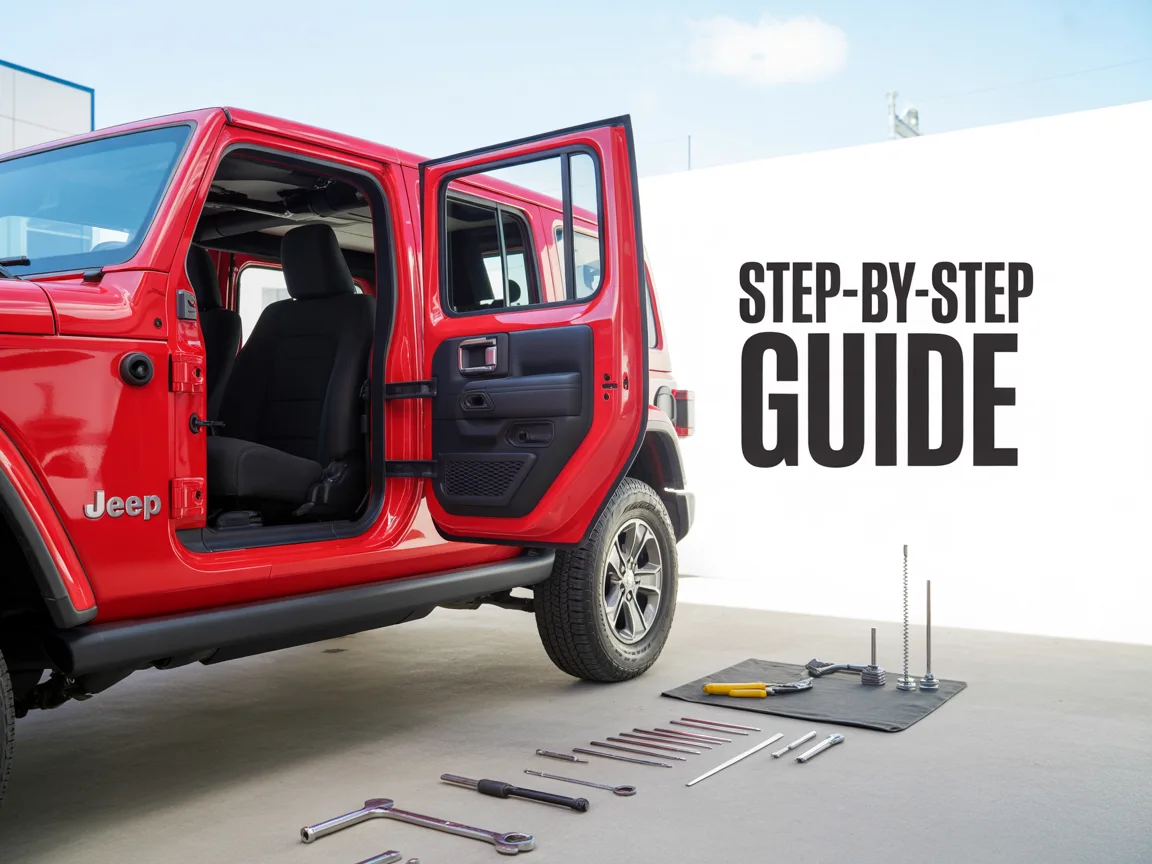
Taking doors off your Jeep Wrangler is one of the most iconic modifications any off-road enthusiast can make. This signature feature transforms your daily driver into an open-air freedom machine perfect for summer trails, beach runs, and maximum ventilation during hot weather adventures. Whether you own a classic YJ from the late 80s, a modern JL Unlimited, or anything in between, removing your Wrangler’s doors is surprisingly straightforward with the right tools and technique.
The process involves removing specific Torx bolts from door hinges and safely storing the doors until reinstallation. Most Wranglers use T30 Torx bits for the upper hinge bolts and standard 10mm sockets for lower mounting points. Safety is paramount during removal since doors can weigh 40-60 pounds each and easily cause injury if dropped.
Different Wrangler generations have slight variations in bolt patterns and hinge designs. YJ models (1987-1995) typically use two bolts per front door hinge. TJ and JK models often feature three-bolt configurations. JL Wranglers maintain similar patterns but may include updated hardware.
Legal considerations are crucial before driving doors-off. Most states require functional side mirrors for safe operation. Additionally, storing removed doors properly prevents damage and ensures easy reinstallation when needed.
This comprehensive guide covers every aspect of safe door removal and reinstallation. You’ll learn essential tools, safety precautions, step-by-step removal processes, and proper storage techniques to maximize your open-air Wrangler experience.
Why Go Doors-Off on a Jeep Wrangler?
Doors-off driving delivers unmatched ventilation and connection with nature that standard air conditioning simply cannot provide. The open-air experience allows maximum airflow during hot summer trails, reduces vehicle weight for improved fuel economy, and provides easier entry and exit during technical off-road sections. Many Jeep enthusiasts consider doors-off driving the ultimate expression of Wrangler freedom.
Weight reduction is a significant performance benefit when doors are removed. Front doors typically weigh 40-50 pounds each, while rear doors on Unlimited models add another 35-40 pounds per side. This weight savings improves acceleration, braking, and overall handling characteristics during spirited driving or challenging trail conditions.
Enhanced visibility is another major advantage for off-road enthusiasts. Without door frames obstructing your view, you gain better sight lines for spotting obstacles, checking wheel placement, and maintaining awareness of surrounding terrain. Trail spotters can communicate more easily with drivers when doors are removed.
However, legal requirements vary significantly by state regarding mirror configurations. Most jurisdictions require at least one functional side mirror when doors are removed. Some states mandate two mirrors for legal street driving. Research local regulations before hitting public roads doors-off.
The best Jeep Wrangler doors off mirrors provide essential safety and legal compliance for open-air adventures.
Tools and Materials You’ll Need
Essential tools for door removal include T30 Torx bits, 10mm sockets, door storage straps, and basic hand tools. A quality Torx bit set prevents bolt stripping during removal and reinstallation. Magnetic bit holders help prevent dropped fasteners during the process. Socket sets with both short and long extensions accommodate various hinge configurations across different Wrangler generations.
Door storage straps or hangers are crucial for protecting removed doors during storage. These accessories prevent door dings, scratches, and damage while hanging in garages or storage areas. Quality straps distribute weight evenly across door frames and include protective padding for painted surfaces.
Optional tools enhance the removal experience significantly. Torque wrenches ensure proper bolt tightening during reinstallation, preventing over-tightening that can strip threads or warp hinge mounting points. Door storage bags protect doors from dust, moisture, and UV damage during extended storage periods.
Budget considerations vary based on tool quality and storage accessories chosen. Basic Torx bits cost $10-20, while professional-grade sets range from $50-100. Door storage systems vary from simple straps at $25-40 to complete hanging systems costing $100-200.
Model-Specific Tool Variations
YJ Wranglers (1987-1995) typically require T30 Torx bits for upper hinges and 10mm sockets for lower mounting bolts. Some earlier models may use different fastener types, so verify your specific configuration before beginning removal. Hardware stores and auto parts retailers stock compatible tools for classic Wranglers.
TJ and JK models are standardized on T30 Torx fasteners for most hinge applications. However, some trim levels or aftermarket hinges may use alternative fastener types. Always verify your specific hardware before beginning the removal process to avoid delays or stripped bolts.
JL Wranglers maintain compatibility with standard T30 bits but may include updated hardware designs. Some newer models feature improved hinge pins or bushings that require specific removal techniques. Consult your Jeep owner’s manual for model-specific procedures and torque specifications.
Safety Precautions Before Removing Doors
Park your Wrangler on level ground before beginning door removal to prevent unexpected movement during the process. Engage the parking brake fully and consider using wheel chocks for additional security, especially on sloped surfaces. Never attempt door removal on uneven terrain where the vehicle might shift unexpectedly.
Legal mirror requirements must be addressed before driving doors-off on public roads. NHTSA side mirror regulations specify minimum visibility requirements that vary by state and local jurisdiction. Install proper doors-off mirrors before leaving your driveway to avoid citations and ensure safe operation.
Common injuries during door removal include pinched fingers, strained backs, and dropped doors, causing foot injuries. Always support doors properly during bolt removal to prevent sudden drops. Work with a helper when possible, especially for heavier rear doors on Unlimited models. Wear closed-toe shoes to protect feet from falling hardware or doors.
Secure all removed hardware in labeled containers to prevent loss during the removal process. Small Torx bolts are easily misplaced and expensive to replace through dealerships. Magnetic parts trays keep fasteners organized and accessible during reinstallation.
Weather conditions significantly impact safety during door removal. Avoid the process during windy conditions that might catch doors and cause injury. Rain or moisture can make surfaces slippery and increase the risk of dropping. Choose calm, dry conditions for the safest door removal experiences.
Step-by-Step: Removing Front Doors
STEP 1: Prepare the Door for Removal
Open the front door completely and secure it in the fully open position. Locate the upper hinge assembly containing two or three T30 Torx bolts, depending on your Wrangler model. Clean any dirt or debris from bolt heads to prevent bit slipping during removal. Position your magnetic parts tray within easy reach to catch removed fasteners.
Insert your T30 Torx bit into the first upper hinge bolt and turn counterclockwise to loosen. Apply steady pressure without forcing to prevent bit or bolt damage. Remove the bolt completely and place it immediately into your parts tray. Repeat this process for all upper hinge bolts, typically two on YJ models and three on newer generations.
STEP 2: Support and Remove Lower Hinge Connection
Have your helper support the door weight while you address the lower hinge connection. Some models use removable hinge pins, while others require bolt removal similar to upper hinges. Identify your specific lower hinge design before proceeding with removal.
For pin-style hinges, use appropriate pin removal tools to drive pins out from bottom to top. Tap gently with a hammer and punch to avoid damage to hinge surfaces. For bolt-style connections, use your 10mm socket to remove lower mounting bolts while your helper maintains door support.
STEP 3: Lift Door Free and Attach Storage Strap
With all fasteners removed, carefully lift the door away from the vehicle body. Doors are heavier than they appear and require controlled movements to prevent dropping. Move slowly and communicate clearly with your helper during this critical step.
Immediately attach your door storage strap or hanger to prevent damage during transport to the storage location. Loop straps through sturdy mounting points on the door frame, avoiding areas with wiring or delicate trim pieces. Proper strap attachment prevents door damage and makes storage much easier.
Handling Heavy Doors Solo
Solo door removal requires extra caution and proper technique to prevent injury or door damage. Use a padded workbench or sawhorses to support doors during bolt removal when no helper is available. Position support surfaces at appropriate heights to match your door’s center of gravity.
Consider purchasing door removal tools designed for single-person operation. These specialized tools include adjustable supports and lifting mechanisms that safely handle door weight during removal and installation processes. While more expensive than basic tools, they provide significant safety benefits for frequent door removal.
Practice proper lifting technique with doors to prevent back strain or injury. Bend your knees, keep your back straight, and lift with your legs rather than your back muscles. Take breaks between doors if you feel fatigued during the process.
Removing Rear Doors (If Applicable – TJ/JL Unlimited)
Rear door removal follows similar procedures to front doors but requires attention to the sequence and latch mechanisms. Begin with upper hinge bolts using the same T30 Torx bit technique described for front doors. Rear doors often have slightly different bolt patterns, so verify your specific configuration before starting.
Check rear door latches and ensure they’re fully disengaged before attempting removal. Some rear doors include child safety locks or additional security features that must be addressed before hinge separation. Consult your owner’s manual for model-specific latch procedures if unfamiliar with your system.
Rear doors on Unlimited models can be heavier than front doors due to larger glass areas and additional structural reinforcement. Always use proper support techniques and consider helper assistance even if you successfully removed front doors solo. The extra weight and awkward positioning make rear doors more challenging to handle safely.
Storage integration becomes more critical with four removed doors requiring secure mounting points. Plan your storage layout before beginning removal to ensure adequate space and proper organization. Label doors clearly to prevent mixing up left and right sides during reinstallation.
Some Unlimited models include different rear hinge designs compared to the front doors. Familiarize yourself with these differences before beginning removal to avoid confusion or improper technique. Quadratec door removal video resources provide visual guidance for various hinge types.
Reinstalling Jeep Wrangler Doors Perfectly
Reinstallation follows reverse removal procedures with critical attention to proper alignment and torque specifications. Begin by positioning doors carefully against hinge mounting points while your helper supports the door weight. Align hinge holes precisely before inserting any fasteners to prevent cross-threading or binding.
Insert upper hinge bolts finger-tight initially to maintain alignment flexibility during the process. Start all upper bolts before tightening any completely to ensure even pressure distribution across hinge mounting surfaces. This technique prevents warping or misalignment during the tightening sequence.
Apply proper torque specifications during final tightening to prevent over-tightening damage or under-tightening looseness. Most Wrangler door hinges require a 10-15 ft-lbs torque specification, but verify your specific model requirements in the Jeep Wrangler owner’s manual torque specs. Use a quality torque wrench for consistent results.
Check door alignment and operation after reinstallation to ensure proper fit and function. Doors should close smoothly without binding or excessive force requirements. Window glass should align properly with weatherstripping, and latches should engage fully without adjustment.
Address any alignment issues immediately rather than accepting a poor door fit. Minor adjustments to hinge bolt positions can resolve most alignment problems without requiring professional assistance. Take time to achieve perfect alignment for the best appearance and weather sealing performance.
Essential Accessories for Doors-Off Driving
Doors-off mirrors are mandatory accessories for legal street driving in most jurisdictions. Quality mirror systems provide clear visibility while maintaining easy installation and removal capabilities. Best Jeep Wrangler doors off mirrors offer various mounting options, including door hinge mounts, windshield brackets, and tubular door alternatives.
Tubular doors provide partial protection while maintaining open-air benefits. These accessories mount using existing hinge points and offer protection from debris without restricting airflow or visibility. Many tubular door designs include integrated mirror mounts for convenient all-in-one solutions.
Storage solutions protect removed doors from damage during extended storage periods. Wall-mounted hangers distribute weight evenly while keeping doors off the garage floors, where damage is more likely. Protective covers shield doors from dust, moisture, and UV exposure during storage.
Enhanced protection accessories complement doors-off driving experiences significantly. Best Jeep Wrangler fenders provide debris protection for vehicle occupants when doors are removed. Quality fender flares also offer improved tire clearance for larger wheel and tire combinations.
Safety accessories become more important when doors are removed from the vehicle. Best Jeep Wrangler rock rails provide enhanced protection for occupants during off-road adventures where traditional door protection is absent.
Frequently Asked Questions
Can I drive doors-off legally on public roads?
Most states allow doors-off driving with proper mirror configurations meeting visibility requirements. Install appropriate doors-off mirrors before street driving and research local regulations for compliance. Some areas have specific restrictions on highway speeds or certain road types when doors are removed.
How should I store removed doors to prevent damage?
Use proper door storage straps or hanging systems that distribute weight evenly across door frames. Store doors in clean, dry locations away from temperature extremes and direct sunlight. Cover stored doors with breathable protective covers to prevent dust accumulation while allowing moisture to escape.
What tools do I need for door removal on different Wrangler models?
Most Wranglers require T30 Torx bits for upper hinges and 10mm sockets for lower connections. YJ models may have variations requiring different fastener types. Always verify your specific hardware before beginning removal to avoid delays or damaged fasteners.
How long does a complete door removal typically take?
Experienced owners can remove all four doors in 30-45 minutes with proper tools and technique. First-time removal may take 60-90 minutes while learning procedures and ensuring safety. Having a helper significantly reduces removal time and increases safety during the process.
Do I need special insurance coverage for doors-off driving?
Standard auto insurance typically covers doors-off driving, but verify coverage with your insurance provider. Some policies may have restrictions on modified vehicles or off-road use that could affect coverage during doors-off operation.
Conclusion
Removing Jeep Wrangler doors safely requires proper tools, technique, and attention to safety throughout the process. Following these detailed steps ensures damage-free removal and secure storage until reinstallation. Remember to install appropriate mirrors before street driving and always prioritize safety during the entire procedure.